- The Meta
- Posts
- Creating a Short Anime Animation with Google VEO 3: A Complete Tutorial
Creating a Short Anime Animation with Google VEO 3: A Complete Tutorial
Matt Lok
July 14, 2025 • Estimated Reading Time: 11 minutes
I had extra Google AI video credits to use, so I decided to create a short 30-second animation and document the entire process. What started as an experiment turned into a fascinating journey through AI-powered animation creation. Here's everything I learned, step by step so you can create your own short animation too.
Note: You a paid Google AI Pro subscription for this tutorial.
Step 0: Planning Your Story with Google Gemini
Before jumping into video generation, I recommend starting with a solid foundation. Use Google Gemini to help develop your story concept and structure.
Why Start with Story Planning?
Gives you a clear direction for your animation
Helps you estimate how many scenes you'll need
Allows you to budget your credits more effectively
Creates a framework for consistent character development
My Process with Gemini:
Initial Concept: I asked Gemini to help brainstorm a short, 45-second animation concept
Character Development: Defined my protagonist (Anya) and her journey
Story Arc: Created a simple beginning, middle, and end
Scene Breakdown: Outlined each scene with specific actions and dialogue
Visual Descriptions: Developed detailed prompts for each scene's aesthetic
The story I developed: A young woman named Anya discovers a mystical forest spirit (KODAMA) and learns about the connection between nature and magic through planting a special seed.
Pro Tip: Having this roadmap saved me from wasting credits on random experimentation. I knew exactly what I wanted to create before I started generating videos.
Prompt:

Generate a detailed, multi-scene story outline for a short, evocative narrative. The story should be structured like a script for a short film or animation.

The core concept must revolve around a central Theme of connection, discovery, or transformation.

Follow this structure precisely:

Title: Create a simple, evocative title.

Theme: Clearly state the central theme. The theme should explore a quiet, profound moment of change or understanding. (e.g., "The quiet connection between humanity and nature," or "The value of handcrafted art in an automated world.")

Core Contrast: Define the central visual and thematic contrast of the story. (e.g., "A manicured, sterile garden vs. a wild, ancient forest," or "A cold, hyper-futuristic city vs. a warm, cluttered workshop.")

Character: Describe a single main character. Focus on their initial state of being or emotional state (e.g., lonely, frustrated, curious, grieving).

The Catalyst/Inciting Incident: What event or object draws the character out of their ordinary state and into the story? It should be subtle and mysterious. (e.g., "A shimmering mote of light from the forest," or "A forgotten melody only the character can hear.")

The Symbolic Object: What physical object is at the heart of the story? This object should represent the story's theme and be the medium for the character's transformation. (e.g., a glowing seed, a clockwork bird, a dusty old book, a forgotten musical instrument).

Scene-by-Scene Breakdown: Create a 5 to 7 scene outline. For each scene:

Scene Title: A short, descriptive title (e.g., "The Lonely Outskirts," "A Silent Conversation").

Core Action: A one or two-sentence summary of what happens in the scene and its emotional goal. Describe the character's progression from their initial state to their final transformation.

Key Visuals & Sounds: List 2-3 specific and powerful visual or auditory moments that define the scene. Focus on sensory details, camera shots (wide, close-up), and the interplay of light and sound to create a distinct mood.
Step 1: Coming Up With Your Character & Visual Aesthetic
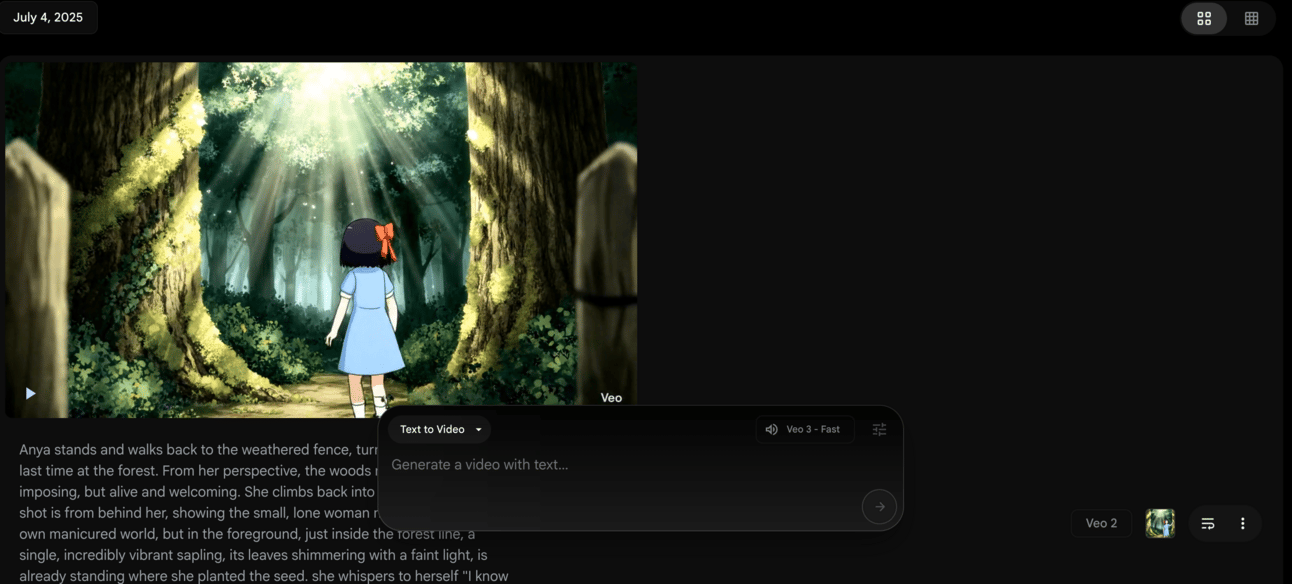
The foundation of any good animation starts with nailing down your character and visual style. Here's where Google Flow's VEO 3 Fast (Text to Video) becomes your best friend.
Why VEO 3 Fast?
It's 5x cheaper than the quality version
Perfect for exploring different ideas and concepts
Great for rapid prototyping
I wanted to learn and tweak my prompts, so I used Gemini to help draft the initial visual concepts based on my story. The key here is experimentation – don't expect perfection on your first try.
My Testing Process:
Test 1: Storybook Vibe I started with a storybook aesthetic, complete with light music, bird sounds, and footsteps. The sound effects were incredible – VEO 3 really shines in this department.
Test 2: Classic Japanese Anime Style This attempt had a nice wisp of smoke detail, but I discovered that VEO 3 won't generate young voices. Mental note: adjust prompts accordingly.
Test 3: Introducing a Woman Character Bringing in a female character made it look more like a kids' TV show (a bit weird for what I was going for), but the voice finally came through! She said "...so quiet out here" which was exactly what I needed.
Final Choice: I combined the best elements from all my tests to create the reference video that would guide the rest of my animation.
Pro Tip: Use this exploration phase to really understand how your prompts affect the output. Each test teaches you something new about the AI's capabilities and limitations.
Step 2: Building the Second Video Inside Google Flow
Once you've nailed the aesthetic, it's time to move into the Scene Builder – Google Flow's built-in video editor. It's pretty basic, but it gets the job done for creating sequential video clips.
Important Technical Switch: To get sound in your next scene videos, you'll need to use VEO 3 - Quality instead of Fast. Yes, it costs 100 credits versus 20, but the audio capabilities are worth it.
The Process:
Take your best video clip from Step 1
Extract a frame to use as your reference image
Use VEO 3 - Quality with your reference image
Generate your next scene
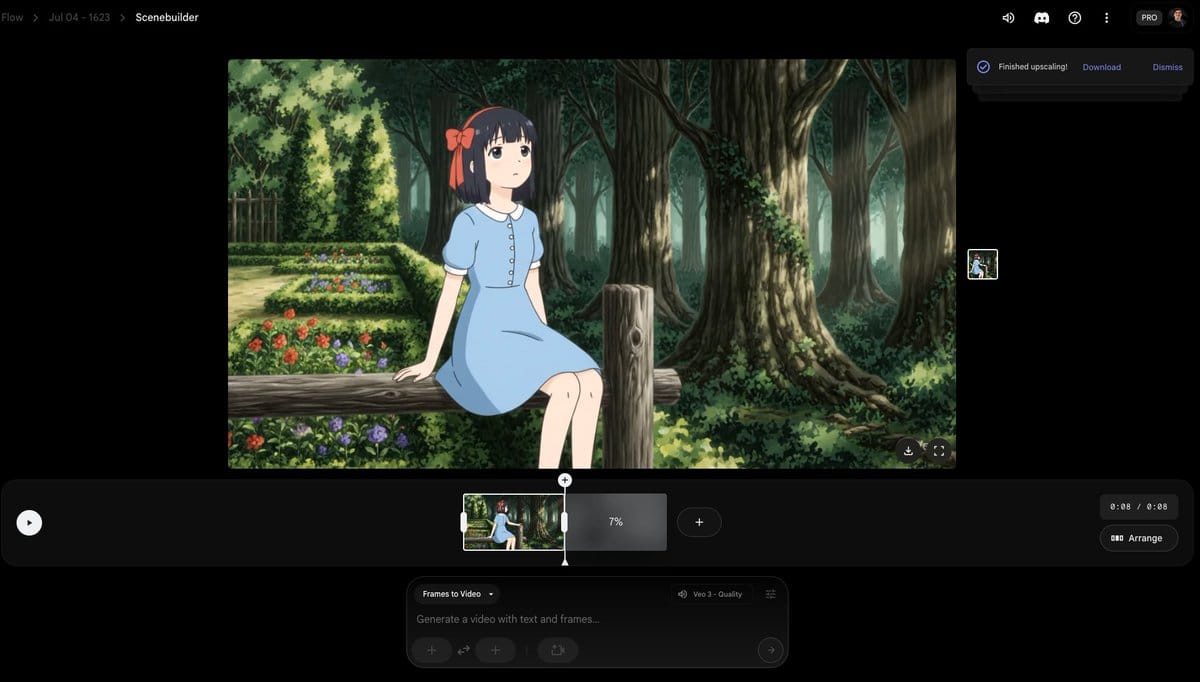
Reality Check: The quality noticeably dropped in my second scene, but it still impressively maintained character and world resemblance. Remember, this was only my first attempt – you could rerun the AI, but I needed to conserve credits for the full animation.
Step 3: Building Out the Story Scenes
Now you're following your Gemini-generated story structure, bringing each planned scene to life. Here's where having a script beforehand really pays off – you know exactly what needs to happen in each scene.
The Creative Process: Following the same process as before, I used the last frame of each video to set up the next one. For creative flair, I introduced a tiny, translucent forest spirit called the KODAMA.
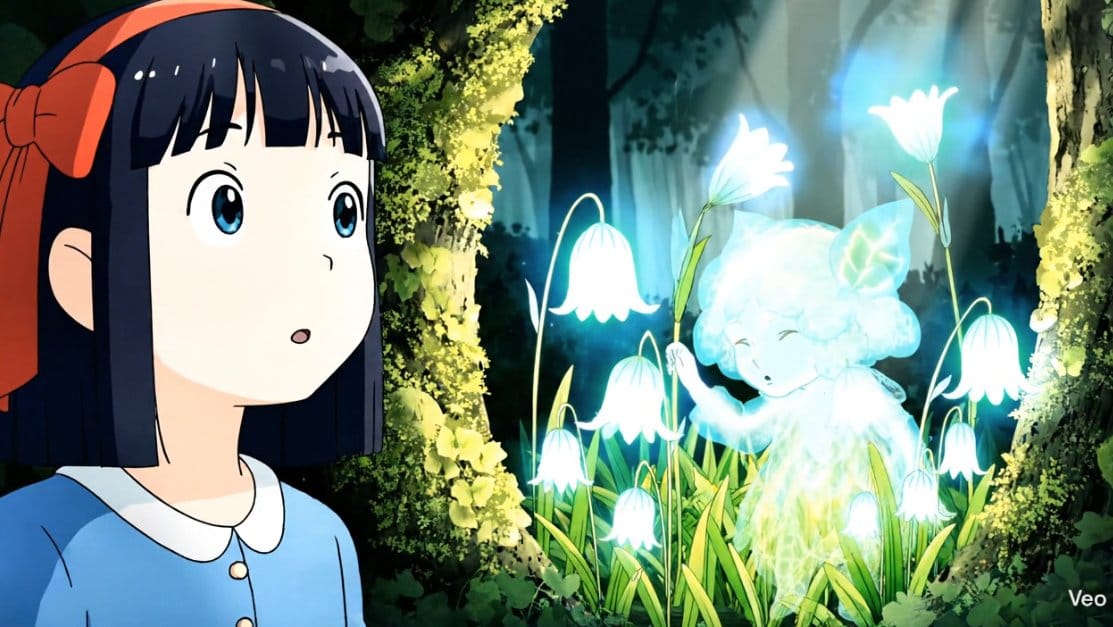
Story Development:
Scene 3: Anya (our protagonist) meets the KODAMA
The forest spirit tends to luminous, bell-shaped flowers
With each hum, a flower pulses with gentle, internal light
The sound design continued to blow me away – the bells, the humming song, everything felt magical and cohesive.
Step 4: Keeping Consistent Character and Aesthetic
This is where many creators stumble. If you keep using the previous scene as reference for the next one, you'll quickly lose character resemblance. It's like a game of telephone – each iteration drifts further from the original.
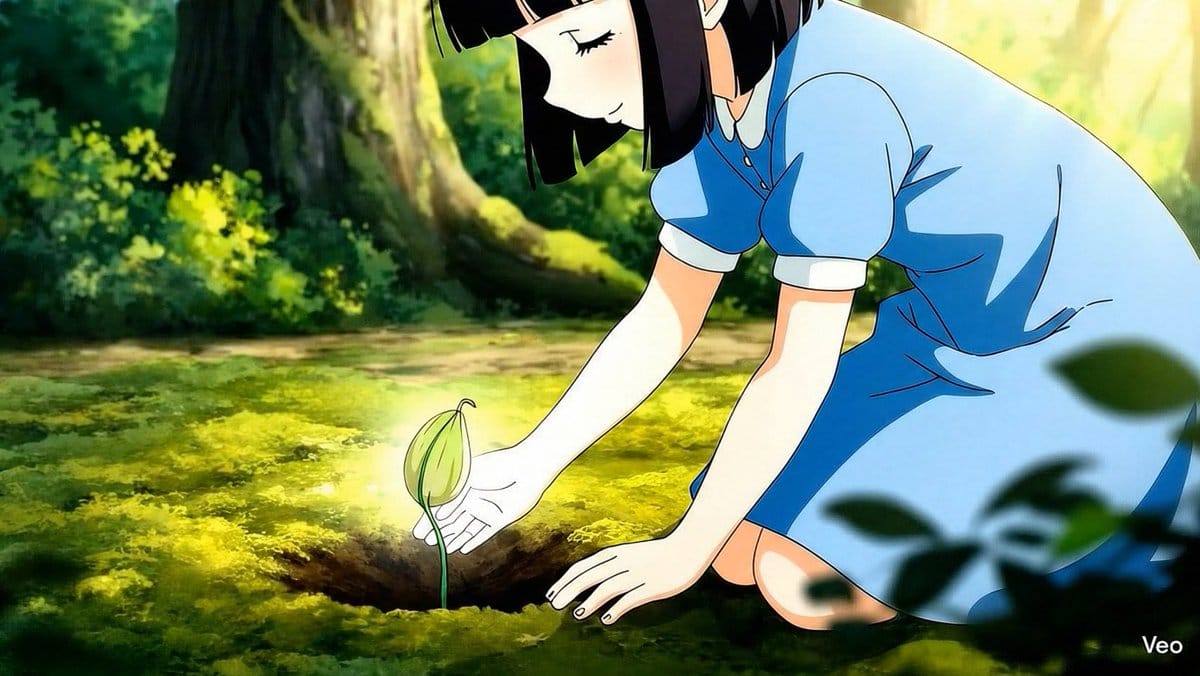
The Solution: Instead of always using the previous scene, go back to Scene 1 or 2 as your reference. You'll edit the continuity later, but maintaining character consistency is crucial.
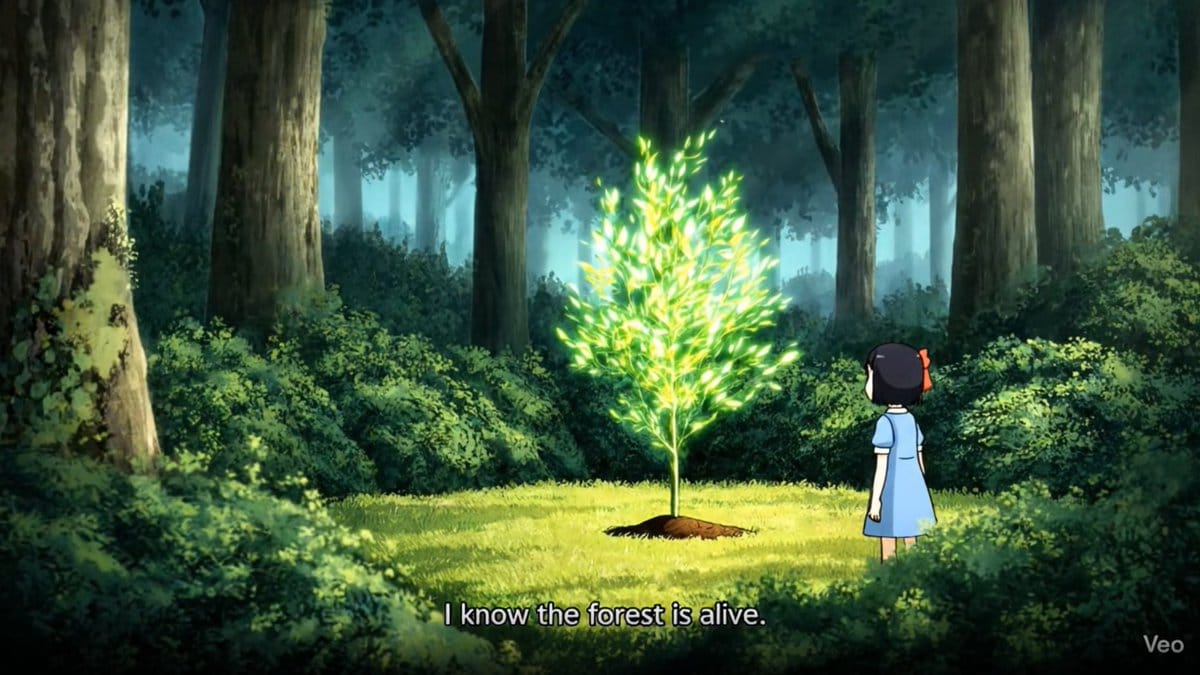
My Experience: For Scene 6 (planting the KODAMA seed), I used an image from Scene 2 as reference. The result was much better – the overall look and feel stayed true to my original vision.
Funny AI Quirk: Instead of having the character speak "Thank you KODAMA," the AI generated subtitles. I guess it's been trained on a lot of subtitled anime films!
Step 5: Creating the Ending Scene
By this point, I was down to my last credits with only one attempt to generate the final scene. Talk about pressure!
But the process you will be following will be the same. Always using a reference image to create your next scene.
The Final Scene Process:
Used a reference image to maintain resemblance
Focused on a satisfying visual conclusion
Accepted that story flow might need editing fixes
Time Investment: It took me 1 hour and 20 minutes to get to this point – not bad for a complete animated sequence.
Step 6: Editing in Canva
Now comes the assembly phase. I chose Canva for its speed and simplicity, but you could use CapCut, Final Cut, or After Effects.
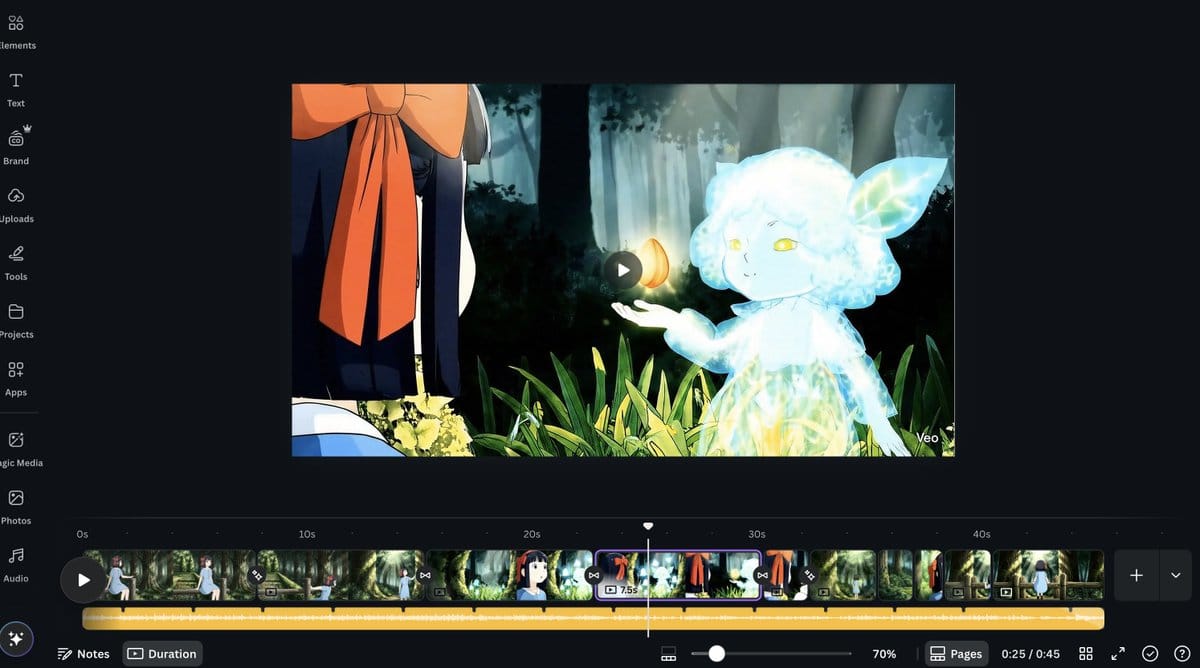
Editing Checklist:
Remove the start of scenes that are just reference images
Add simple transitions between scenes
Include light background music
Fix any story flow issues that emerged during generation
The Reality: The story flow got a bit messed up during the AI generation process, but that's exactly what the editing phase is for.
Key Takeaways & Tips
Credit Management:
VEO 3 Fast: 20 credits (great for exploration)
VEO 3 Quality: 100 credits (needed for reference images and sound)
Plan your credit usage strategically
Character Consistency:
Don't chain reference images from scene to scene
Return to early scenes for character reference
Expect some drift, plan to fix in editing
Sound Design:
VEO 3's audio capabilities are impressive for voice, sound effects and music.
Include sound descriptions in your prompts
The AI often adds atmospheric details you didn't expect
Prompt Evolution:
Start with Gemini or similar AI for initial drafts
Learn from each test iteration
Adjust for VEO 3's limitations (like young voices)
Time Investment:
Expect 1-2 hours for a 45-second animation
Most time is spent in the exploration phase
Editing is relatively quick with the right tools
Final Thoughts
Creating this animation was an absolute blast. While I'm now out of credits, I learned tons about AI animation workflows, prompt engineering, and the current capabilities of tools like VEO 3.
The technology isn't perfect – you'll encounter quirks, quality variations, and unexpected results. But that's part of the creative process. Each limitation teaches you something new about working with AI as a creative partner.
Happy creating!
Got questions about the process? Want to share your own VEO 3 experiments? I'd love to see what you create with these techniques.
This tutorial documents my real experience creating a 45-second anime animation using Google VEO 3. Results may vary, and the technology is constantly evolving – but the core principles should remain useful for anyone diving into AI animation.